You see, I have a lot of hobbies. They take a lot of tools. And then we have our 6 family members with our "stuff" and our furniture. We try to keep it limited, but it's difficult when we all have our creature comforts.
Back to the build! We went to our local hardware store and bought the needed supplies:
Wood Cuts
2 (Top and Bottom) - 1" x 4" x (your measurement) - The bottom is 1.5" less than the top2 Legs - 1" x 3" x (your measurement) - Measure the height
1 or 2 Middle supports- 1" x 2" x height between top and bottom lengths
Other Supplies
*Inexpensive extension cord - 1 per outlet (we used 2 on the couch) We used this one
*Outlet of your choice - We used this one
*Outlet cover - We used this one
*Electrical Tape - Similar to this
*Outlet Box - Like this
*Screws - 1 1/8"
*Stain
 |
| Husband using a chisel to open the square after using a handsaw |
Tools Needed
Rotary Saw
Jigsaw
Chisel (Not necessary but useful)
Drill with Drill Bit and Screw Bit
Pencil
Measuring Tape
Carpenter Square
Sand Paper
Rag and Gloves
Ok. Now that you have everything cut out and sanded it's time to put it together. We took the top and screwed the legs on. Then screwed the bottom to the legs - the bottom length goes between the legs so screw from the sides. You can choose to put the bottom support right at the floor level, or raise it up a little, but remember that the support bars will need something to push on - this video is with the bottom support raised, we chose to change it for the second build.
 |
| Finished couch shelf. Outlets plugged in with the extension cords |
With the big frame and the supports together, I stained it using Minwax Red Oak 235 so it can dry while I get the rest figured out.
Now it's time to get the wiring figured out. First, you cut off the outlets on the extension cord and strip the wire about 1/2". Make sure you screw the plastic box into the frame and knock out a hole for the cord.
 |
| Screwing the box to the frame |
 |
| The wire threaded through the hole in the box |
With the cord threaded through the box that is screwed into the frame, you need to connect the wires to the outlet.
 |
| Connect the wire to the outlet |
We then wrapped the outlet with electrical wire tape so there was an added layer of security between my furniture and the current.


Outlet finished, screw it into the box on the frame, then screw the cover plate and you're finished!

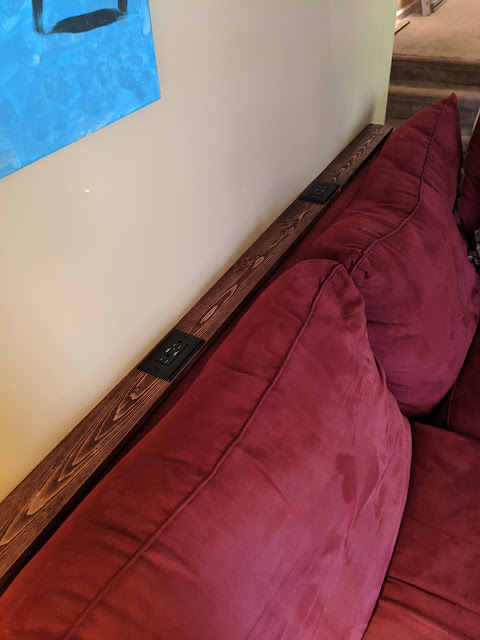
Here's what it looks like behind our couch -
 |
| Placing the shelf behind our couch |
 |
| Once placed, the couch holds the shelf stable against the wall |
 |
| This is the space that eats pillows... I have no where to place the tv remote, my phone or glasses or anything |
 |
| With the added shelf, I now have an accessible outlet on my side by the wall and our pillows won't get swallowed into the black hole! |
I am so excited to see if you can make your own version of this shelf! It takes up hardly any space and is such a useful addition to our home!
This post includes links, but I will not get paid if you click on them. I included them for your convenience -feel free to purchase supplies anywhere you want.
~Melanie


